Your first five minutes, start to finish. Account, carb goal,
permissions, and a quick lap around the home screen.
KetoLens is designed so you can log your first meal almost
immediately. There's a short setup the first time you open it —
here's exactly what happens, so nothing catches you off guard.
1. Create an account
Takes about 30 seconds
You can sign up three ways — pick whichever you trust with
your breakfast:
Continue with Apple — fastest on iPhone, and you can hide your email if you like.
Continue with Google — one tap if you're already signed into Google.
Email & password — the classic. We'll send a 6-digit code to verify your address.
Already have an account? Tap
Sign in at the bottom instead, or use
Forgot password? if past-you was
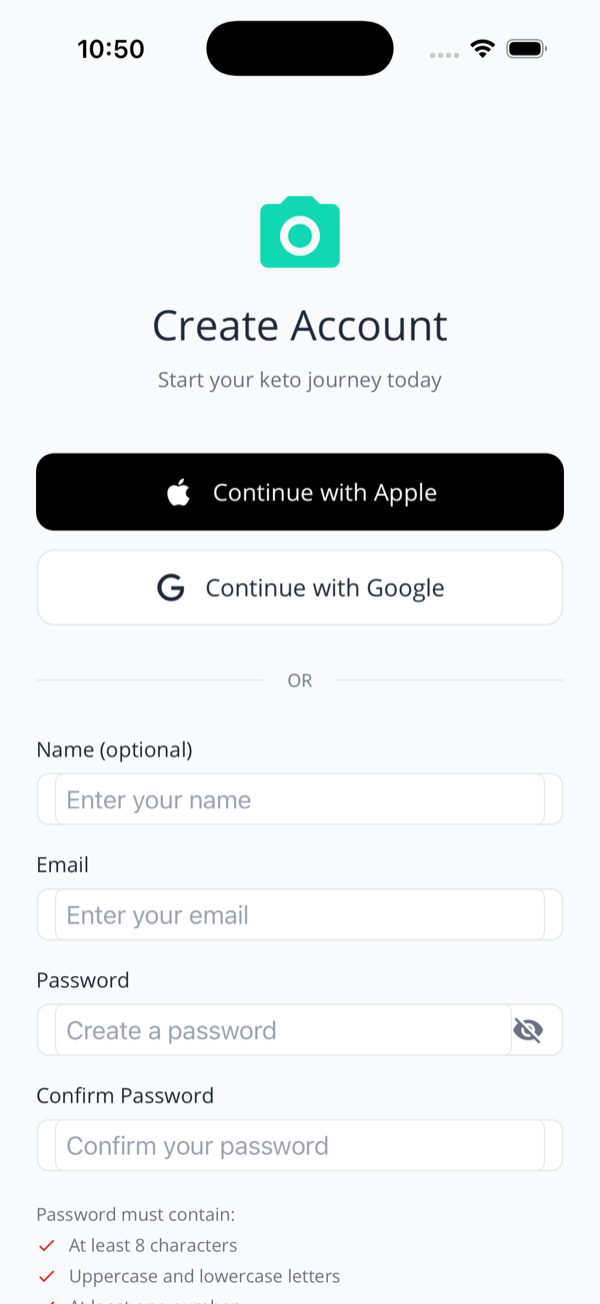
forgetful. Email sign-up asks for an optional name and
a password that needs at least 8 characters, upper- and
lower-case letters, a number, and a symbol — the app
ticks each rule off as you type.
The Create Account screen. The password rules tick green as you satisfy them.
Verifying your email
If you sign up with email, we send a 6-digit code. Pop it in, and you're through. Didn't get it? There's a Resend Code link once the short cooldown ends — check spam while you wait.
2. The 60-second intro
Skippable, but worth a swipe
Brand-new accounts get a short swipe-through intro. It's not
filler — it explains the three things that make KetoLens
different from every other food tracker. Hit
Skip in the top corner any time you've seen
enough.
Snap a photo, the AI does the macro maths.
Snap. Analyse. Track.
Point your camera at a plate and the AI identifies
every food on it, then estimates the macros in
seconds. No barcode hunting, no scrolling a database.
Hidden carbs are the whole point.
Sneaky carbs, caught
Sauces, dressings, breading, root veg — the carbs that
quietly knock you out of ketosis. KetoLens flags the
usual suspects so they don't blindside you.
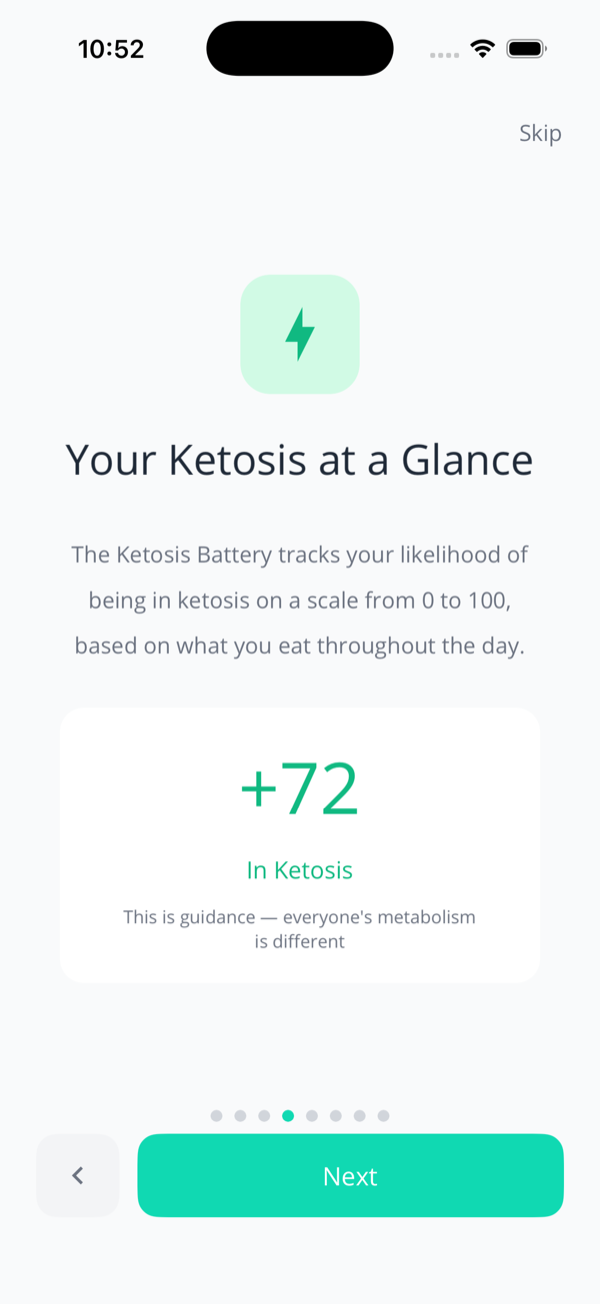
The Ketosis Battery, explained in one screen.
Your ketosis at a glance
The Ketosis Battery scores how likely
you are to be in ketosis, 0 to 100, based on what
you've eaten. It's guidance, not a blood test —
everyone's metabolism is different. There's a
whole page on the battery
if you want the deep version.
The intro also covers honest estimates (we
show net-carb ranges, not made-up exact numbers) and
teaching the AI (your corrections make it
smarter). Same ideas, more screens.
3. Quick Setup — your carb goal
Optional · change it any time
Before you land in the app, there's a one-screen
Quick Setup. Two settings, both editable
later in Settings if you change
your mind:
Daily Net Carb Goal — a slider from 10g to 75g. Most people do best around 20–25g; the app labels the zone as you drag so you know whether you're in "recommended", "moderate", or "flexible" territory.
Use Metric Units — grams and kilograms, or switch it off for imperial.
Tap Let's Go! to save, or
Skip setup to take the defaults (a 25g goal,
metric units). Nothing here is permanent.
Not sure what to pick?
Start at 25g. It's a sensible keto default, and your Carb Tank and Ketosis Battery both calibrate to whatever number you set. You can nudge it later once you see how your body responds.
4. Camera & photo permissions
You stay in control
To snap and upload meals, KetoLens asks for two iOS
permissions. You can grant them now or
Skip for now and decide later — the app keeps
working either way, you'll just be nudged again when you first
try to use the camera.
Camera — so you can photograph a meal and have it analysed on the spot.
Photo Library — so you can pick a photo you already took. Without it, you can still snap with the camera or log manually.
Notifications — optional, for meal reminders and "analysis done" alerts. Tap Allow on the system prompt, or turn them on later in Settings.
About your photos
Meal photos are processed securely and kept for only 7 days, then deleted. They exist to be analysed, not archived.
5. The home tour
Coach marks, not homework
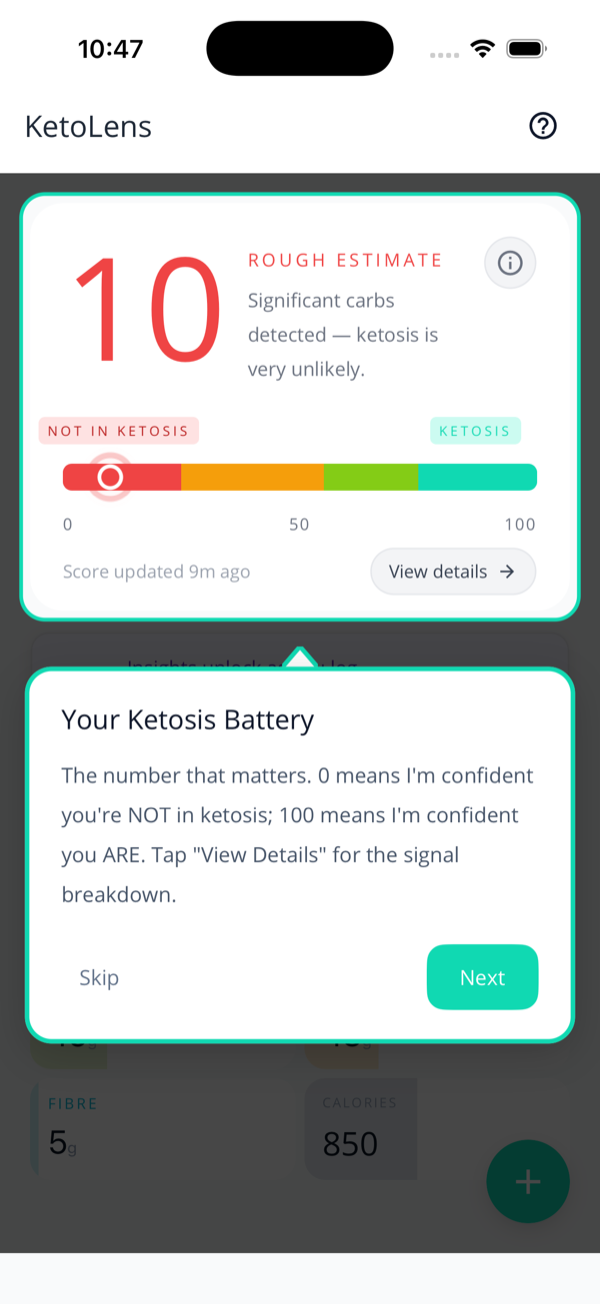
The first-launch tour points out each part of the home screen.
The very first time you reach the home screen, a short
guided tour highlights each piece in turn — the
Ketosis Battery, the Carb Tank, the macro tiles, and
the green + button you'll use to log.
Tap Next to step through it, or
Skip if you'd rather poke around
yourself. You can replay it any time from the
? help button in the top corner.
6. Your home screen, decoded
The five-second version
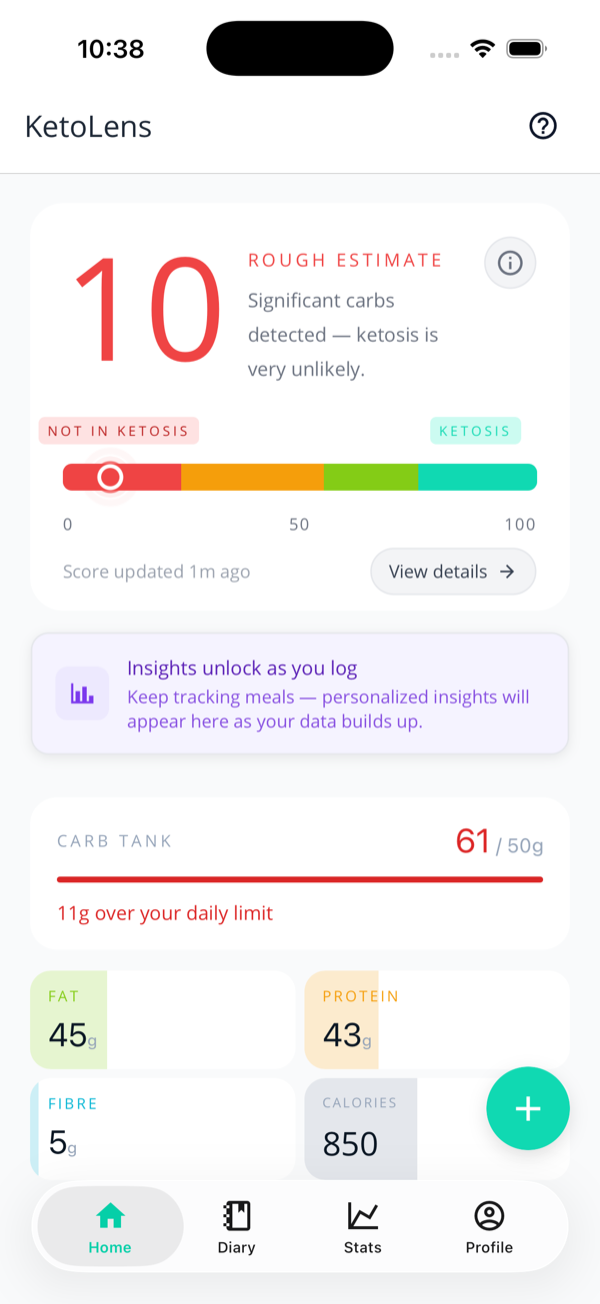
From top to bottom you'll see the
Ketosis Battery (your 0–100 score for
today), an Insights teaser, the
Carb Tank, and your
macro tiles — with the green
+ button for logging. Each part gets
the full treatment on the
Ketosis Battery page;
this is just the lay of the land.
The four tabs along the bottom — Home,
Diary, Stats, and
Profile — are where everything else
lives.
Home: battery up top, Carb Tank and macro tiles below.
That's the whole setup. Time to log something — the
logging guide covers all
three ways to do it.
Next: time to put it to work — the three ways to log your first meal.